“Inside!” Button for Dog
Motivation
We had just gotten a new puppy when my wife saw a video of a dog that used buttons to communicate its needs:
Determined to make our dog the most interesting, best trained dog in the world, she ordered some of these buttons right away.
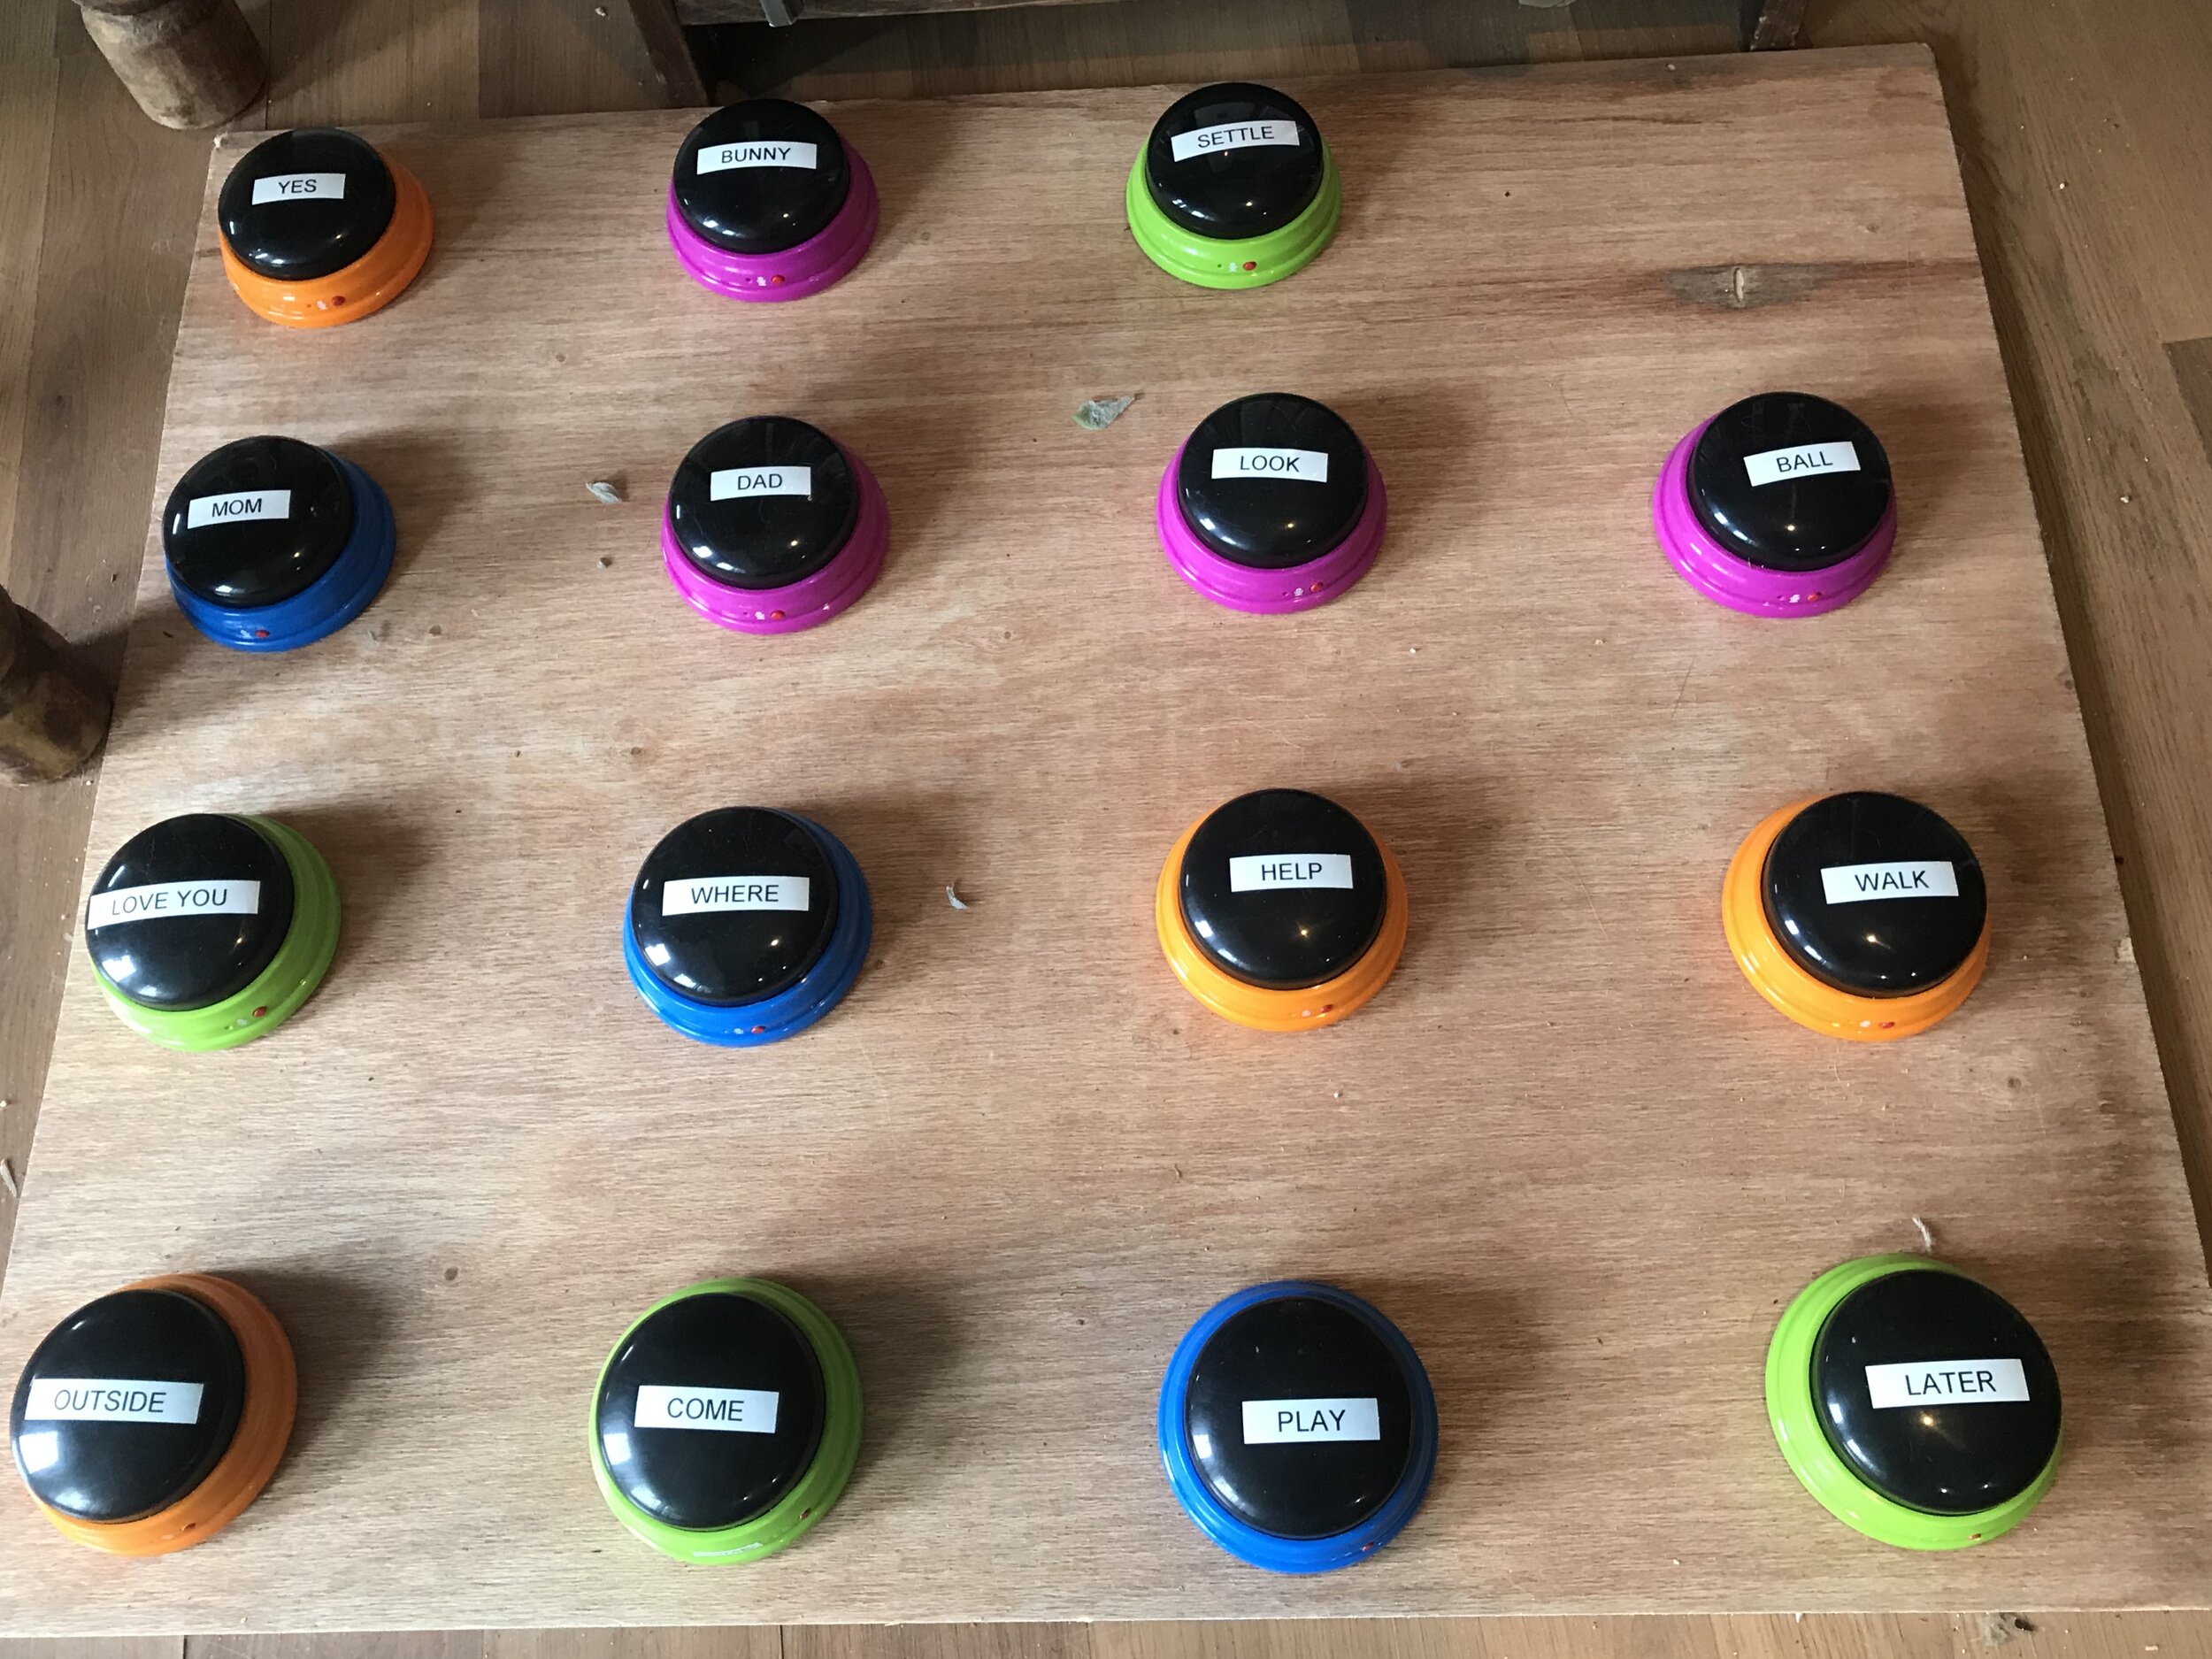
We started small, with just a single button for “outside” placed near the back door. My wife witnessed the break through moment when our dog made the connection between the button and the door. Since then we’ve been adding more buttons for increasingly complicated ideas. Whenever she touches one, intentionally or by accident, we try to reinforce the action by responding appropriately. It has been fascinating to watch her learn.
Sometimes our dog (Bunny) likes to take her time in the backyard, so we would leave he unsupervised. I didn’t want her to develop the habit of barking or scratching the door to be let in, so I set about hacking one of the buttons. I knew we would need to hear the recorded message inside the house, but the pressing mechanism would need to be outside. We live in western Washington, so I also had to expect a wet environment.
Process
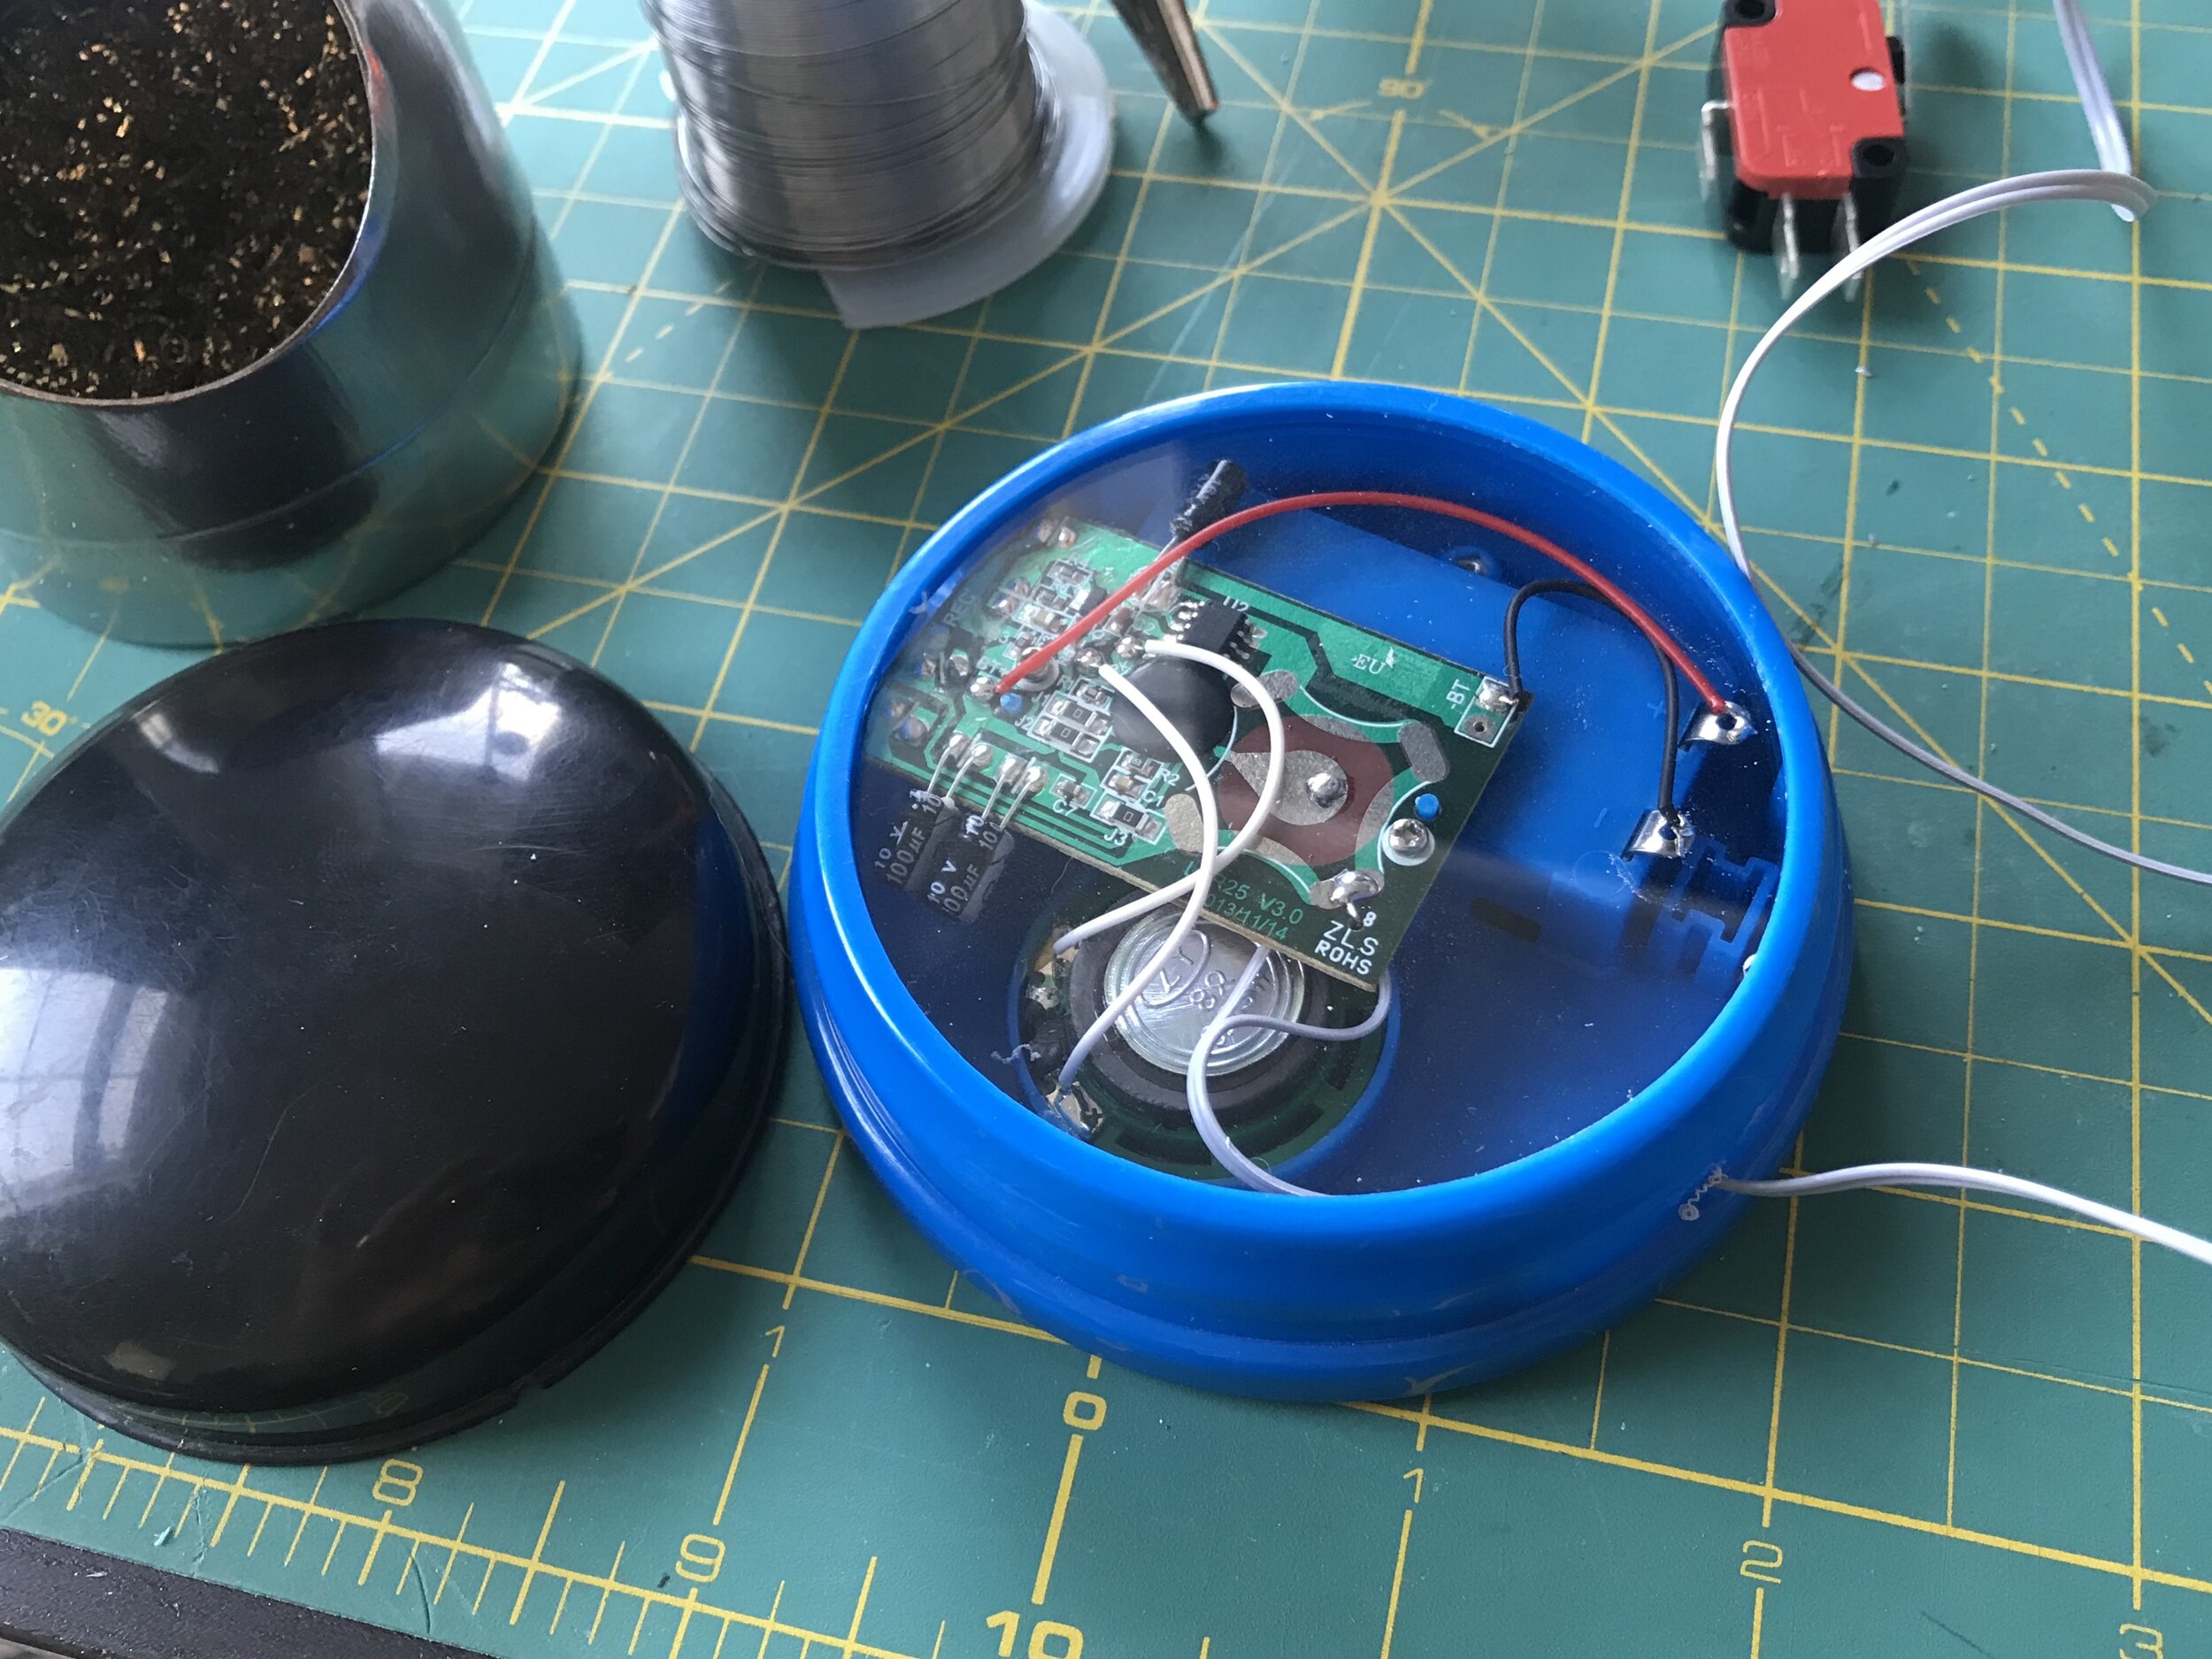
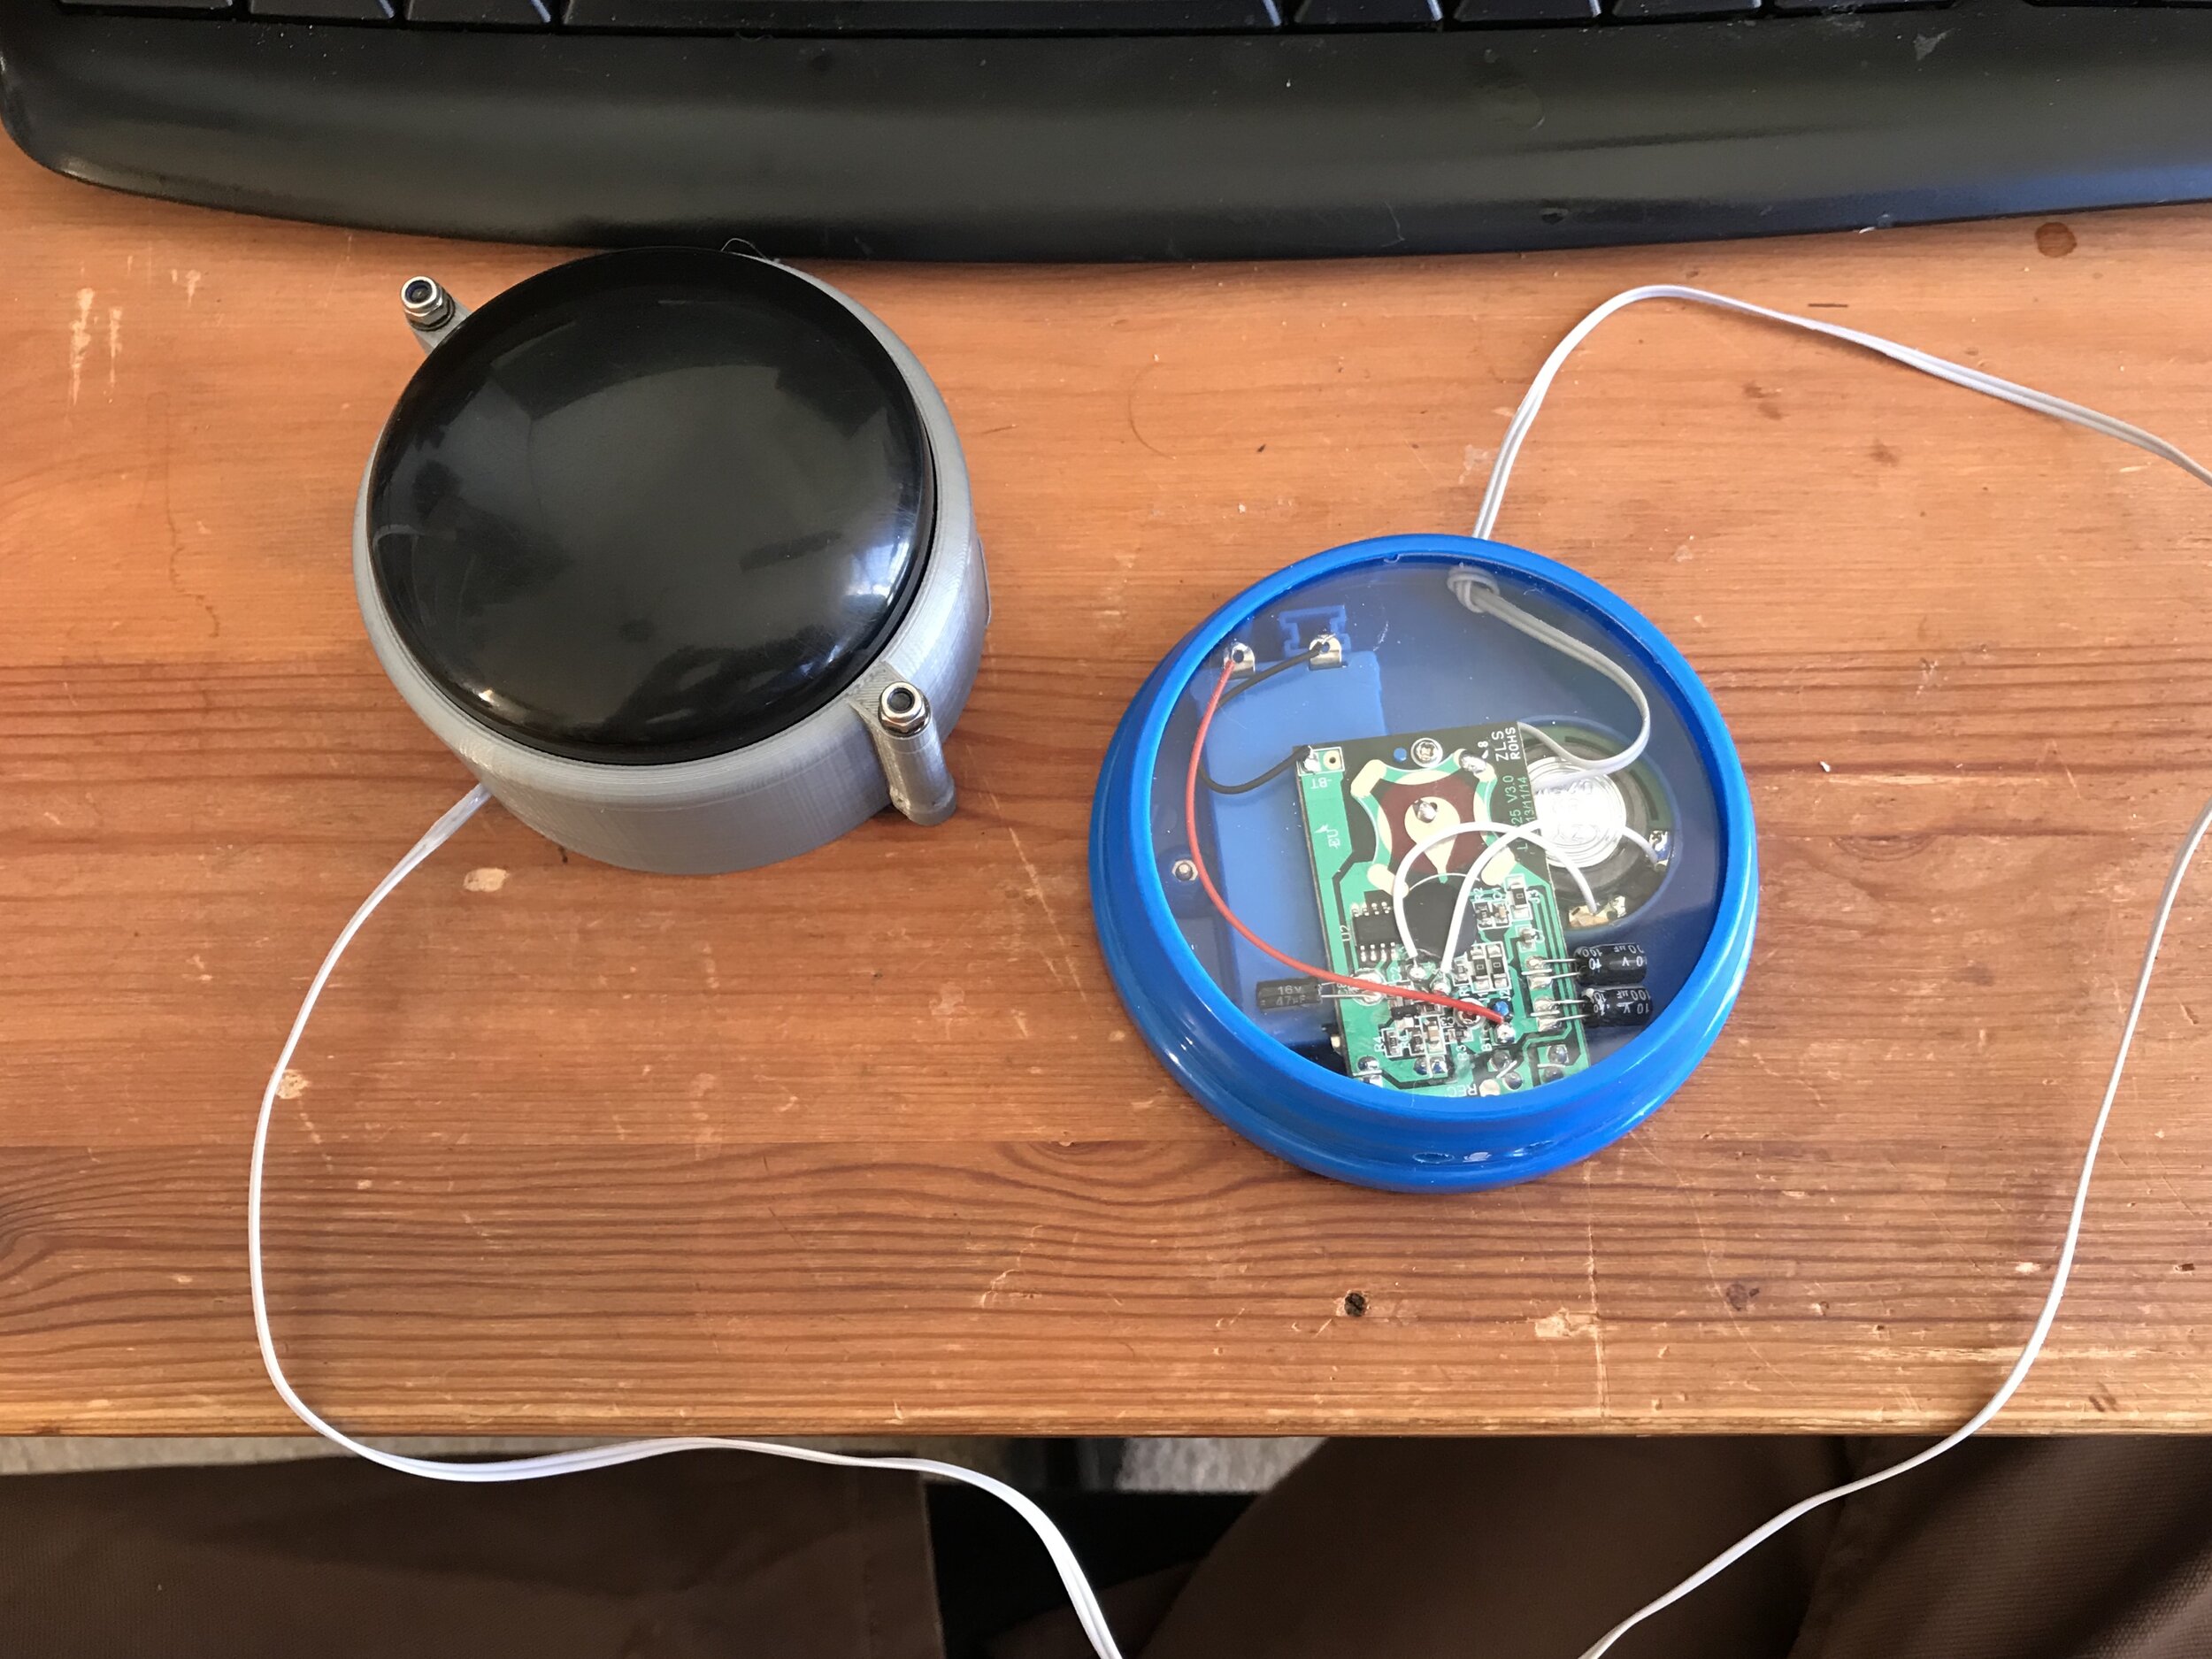
My wife allowed me to dissect one of the buttons that wasn’t working properly. I found what you might expect: a cheap speaker, a couple components large enough to actually hack, and all the good stuff hidden under a black blob of epoxy. I found that the only thing wrong with this button was that the microphone was oddly sensitive; if held properly, a message could still be recorded. I focused my attention on the triggering mechanism. It was a flexible metal disc, which once pressed connected two conductive pads on the circuit board. In this picture the disc has been loosened and flipped over. I figured I could solder some wires to these contact pads and connect them to a sturdy, weather-proof N.O. switch, then house the switch outside while the rest of the electronics remained inside (running the wires under the door). Here I’ve laid out a limiter switch that I initially thought I might use.

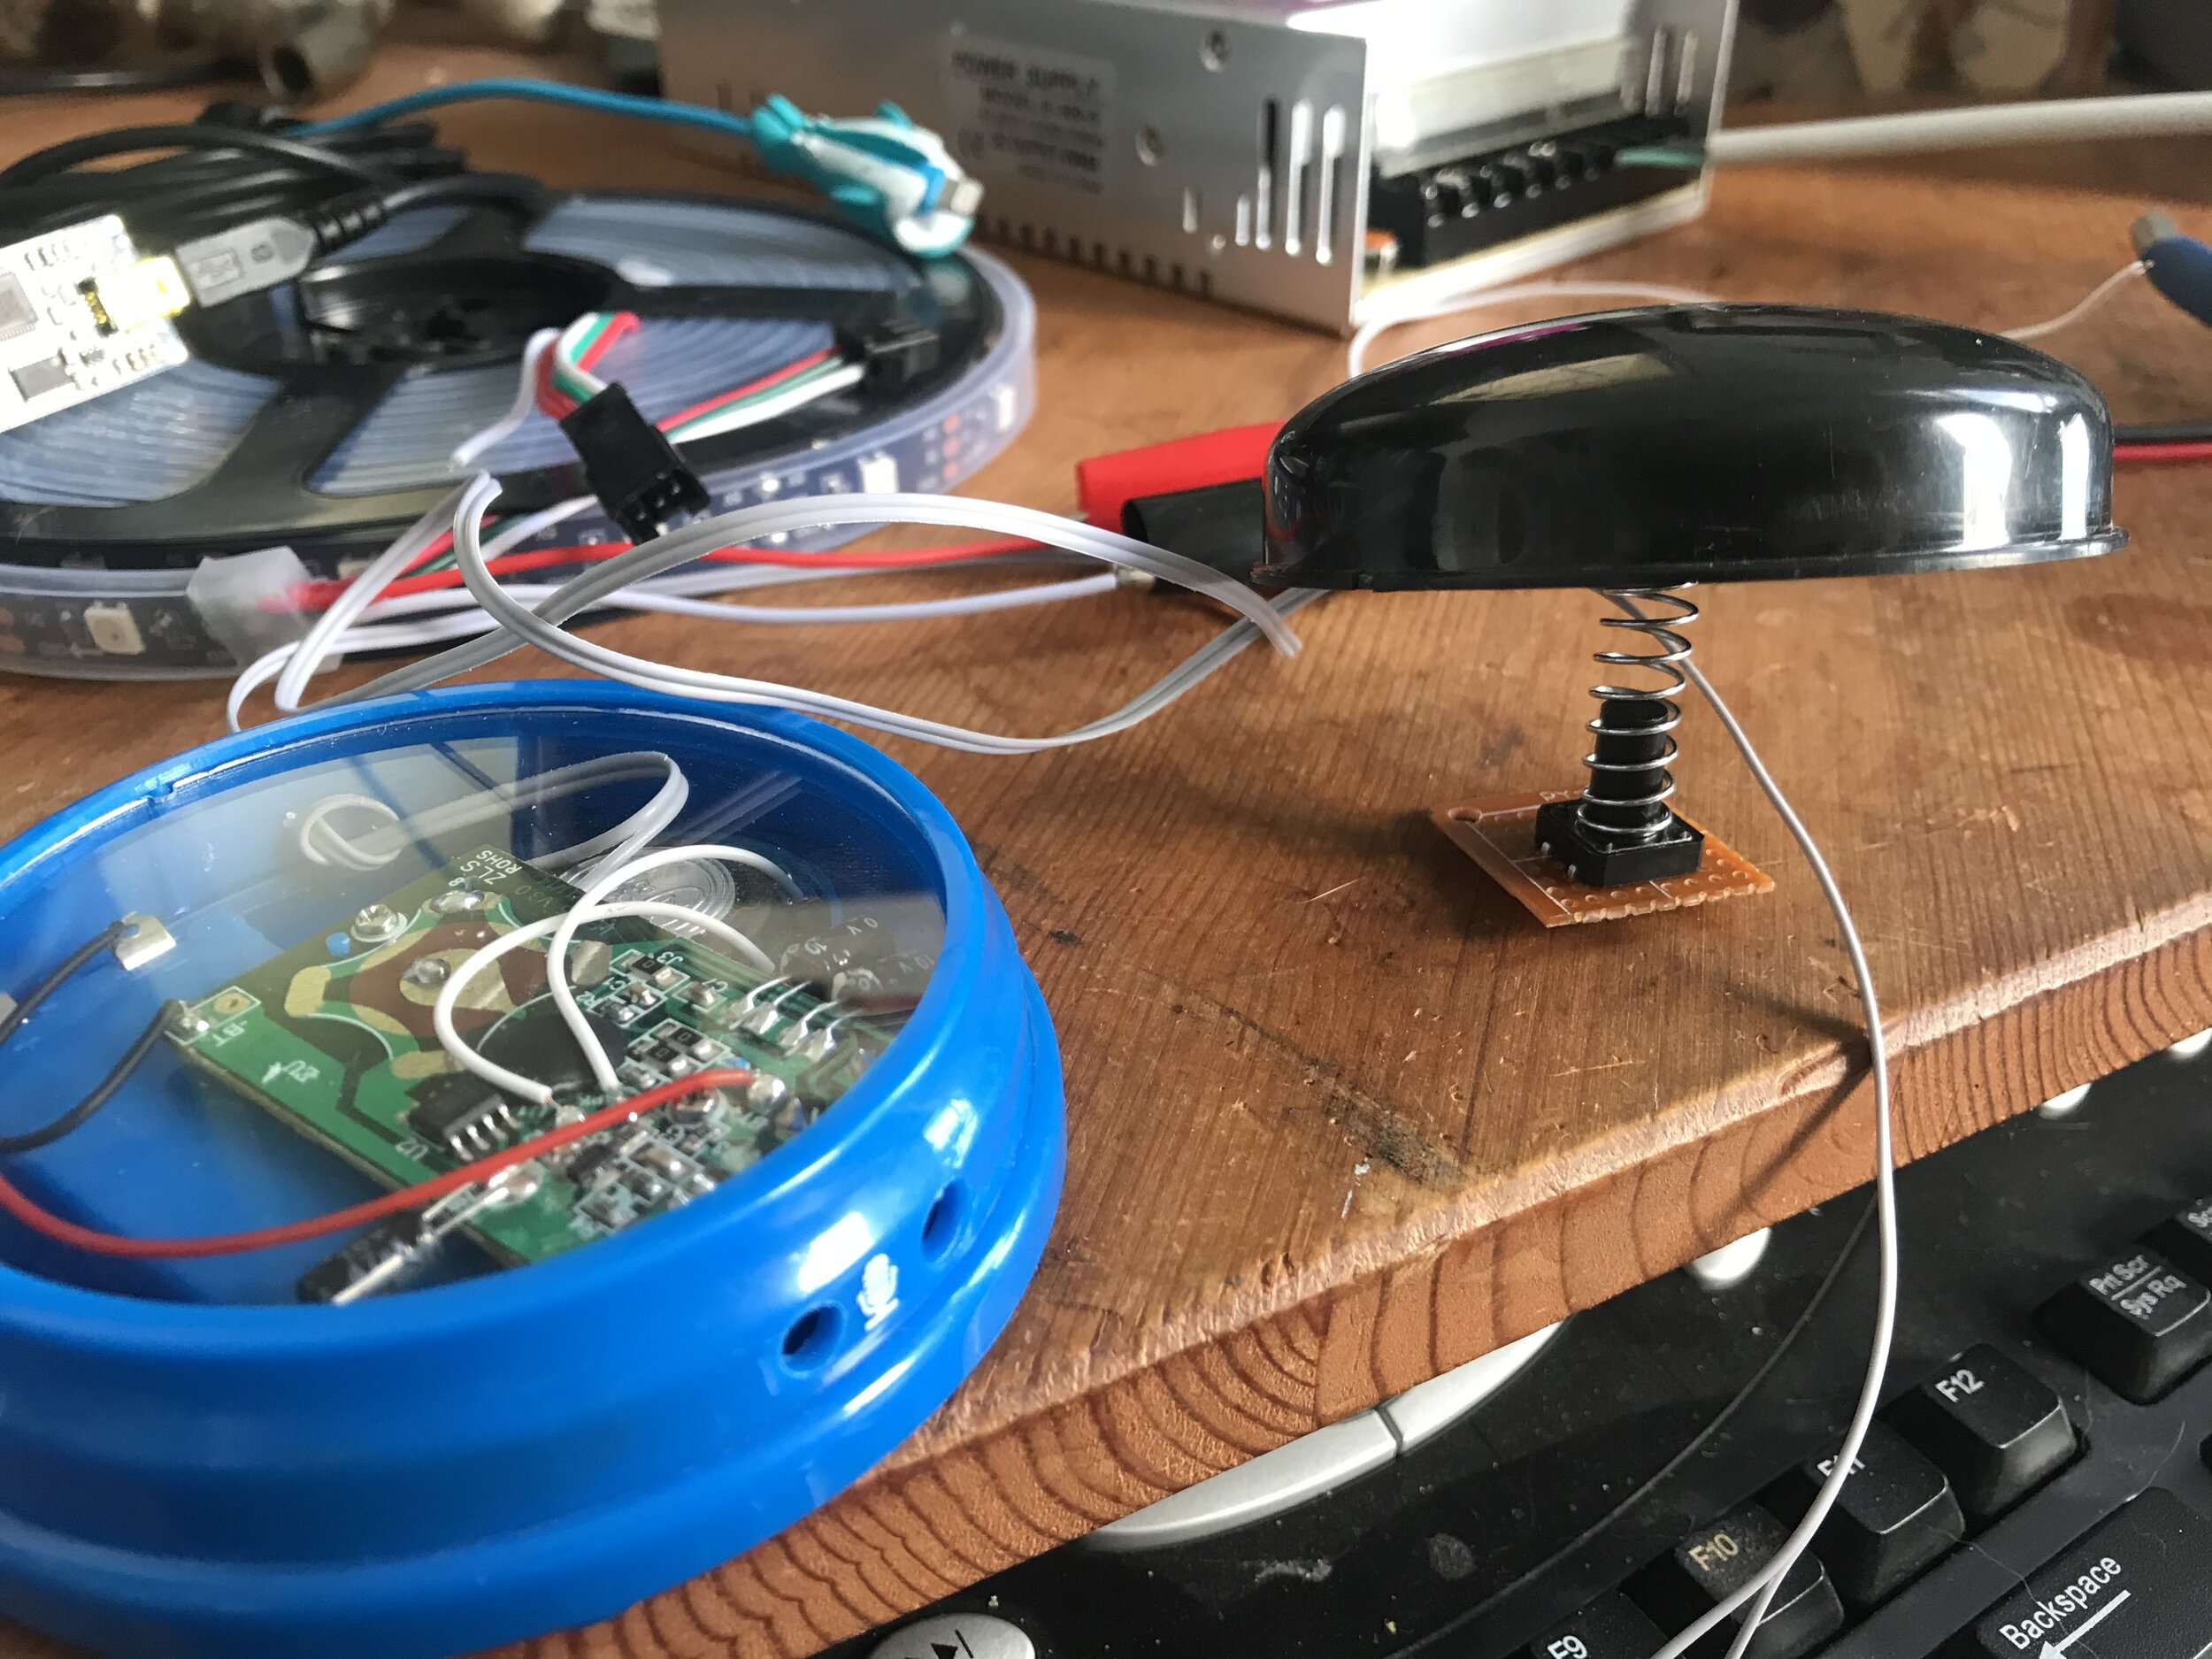
I drilled two small holes in the circuit board near each pad and soldered some scrap wire directly on these pads. I then drilled a hole in the casing for the wire to pass through and tied a knot in the wire so it wouldn’t strain the solder points if pulled. I also laser cut a clear acrylic disc to replace the black plastic button, which I decided to use for the outside component.

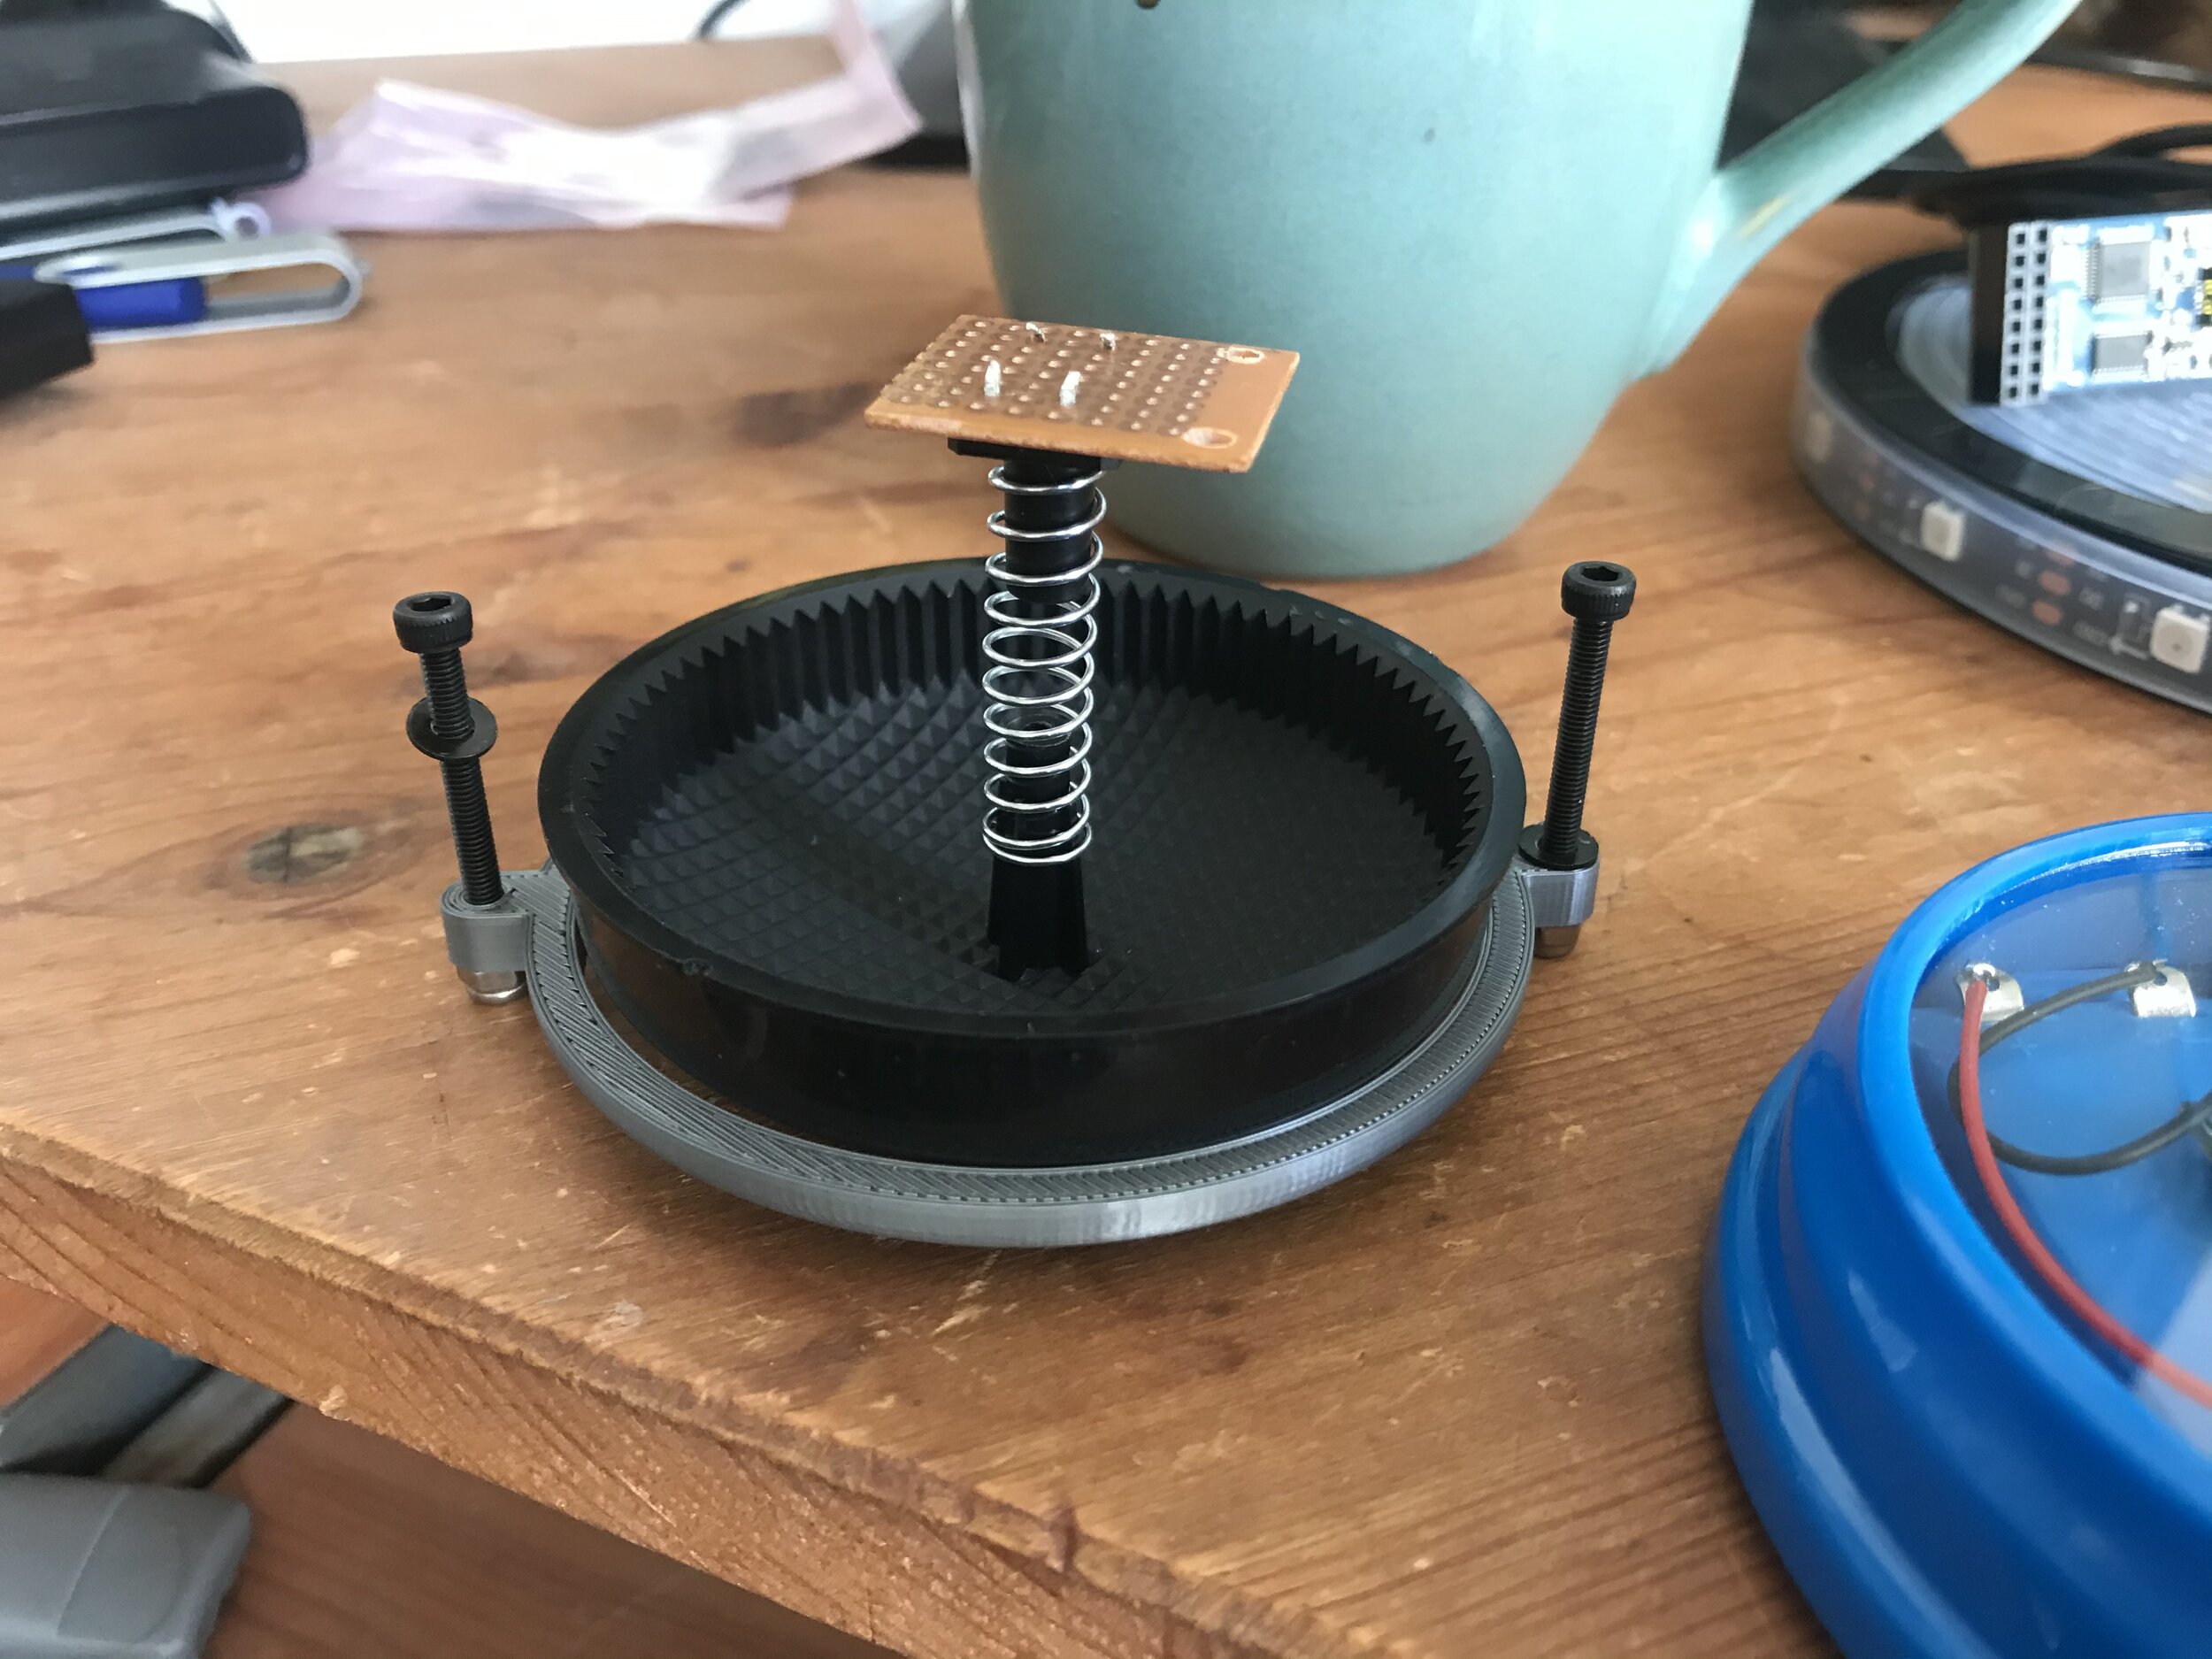
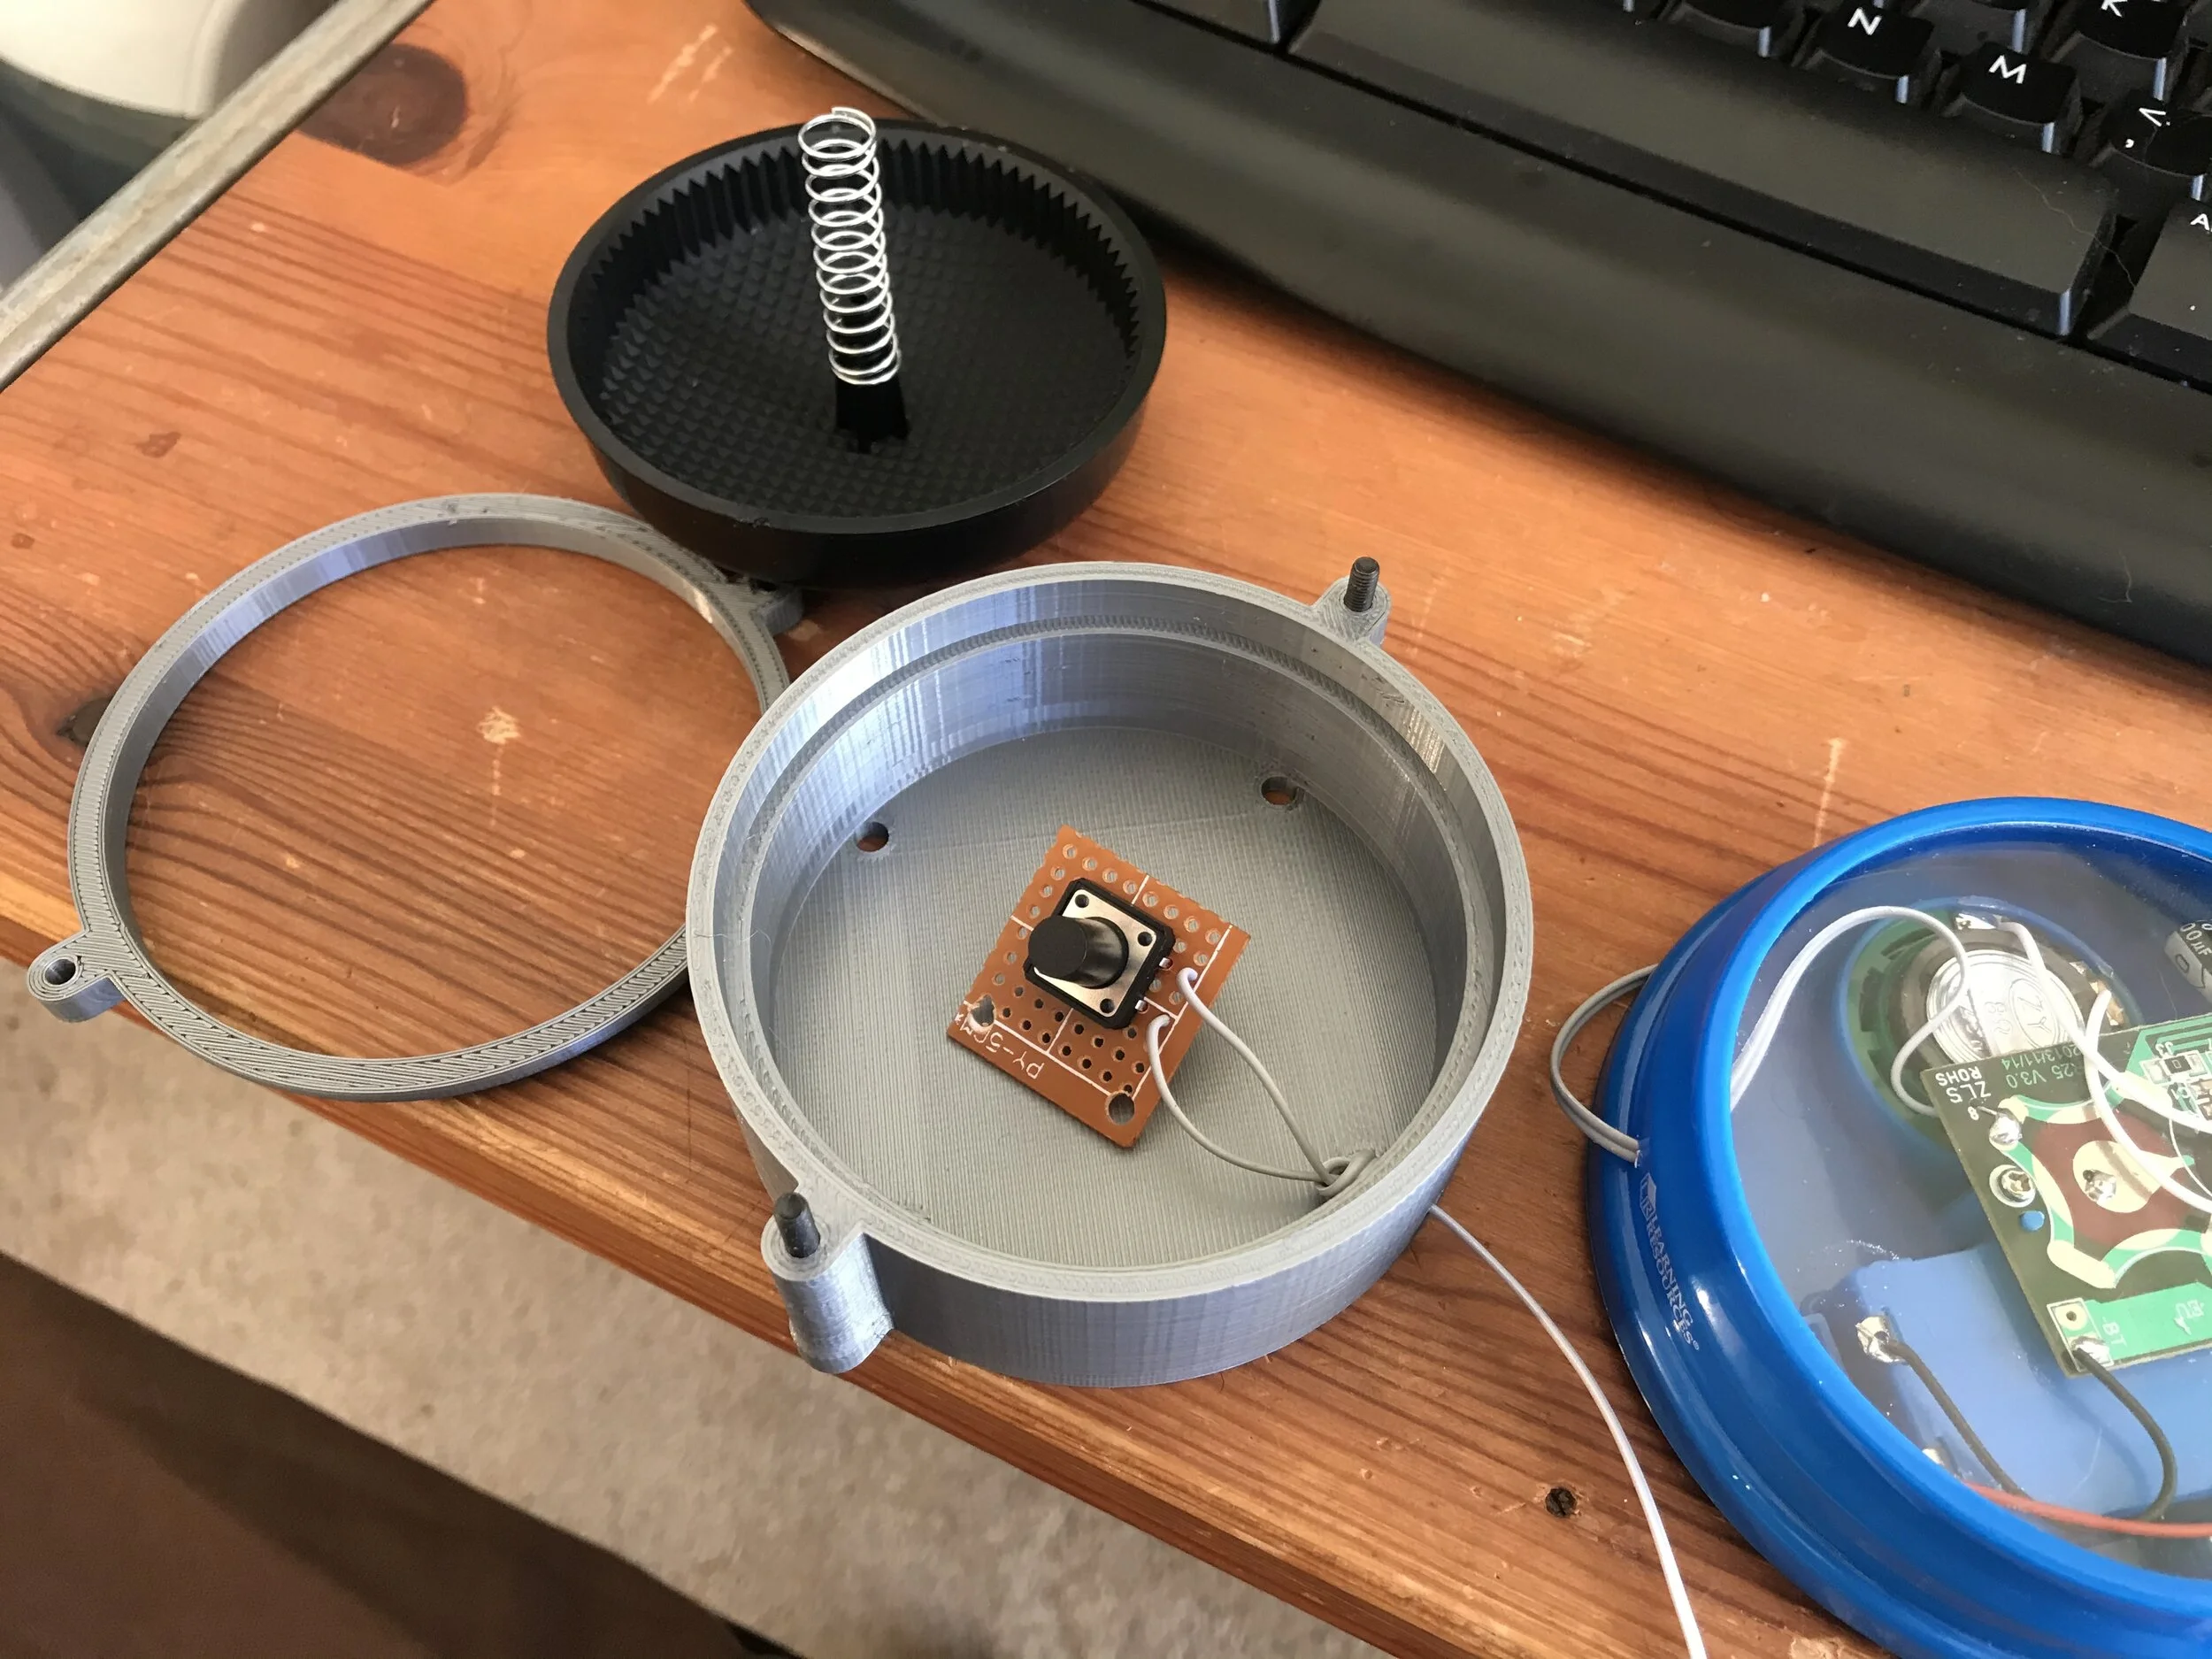
Since Bunny was already familiar with the look and feel of the buttons, I decided to make the outdoor mechanism look as much like the original button as possible. In Fusion 360 I created 3D-printable parts that could house some simple electronics and incorporate the black plastic cap left over from the dissected button. I left a hole to route wires through and put some holes in the bottom for water drainage since the button would be exposed to rain.
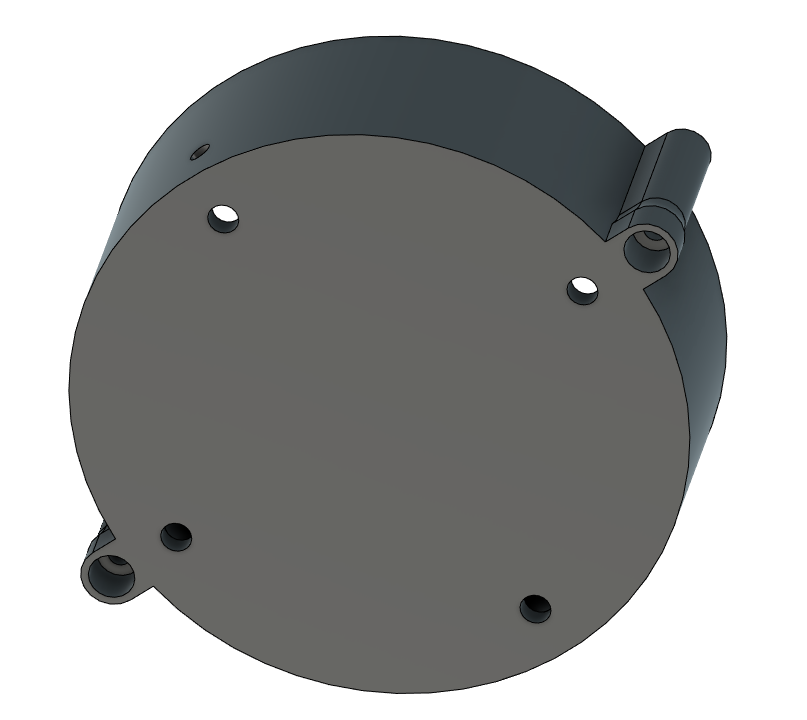
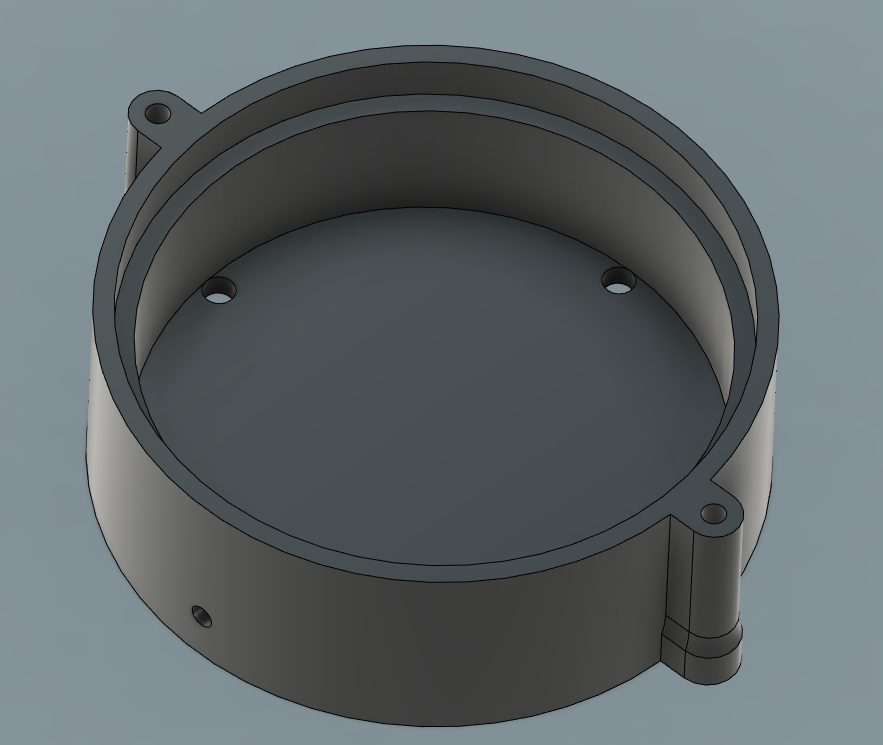
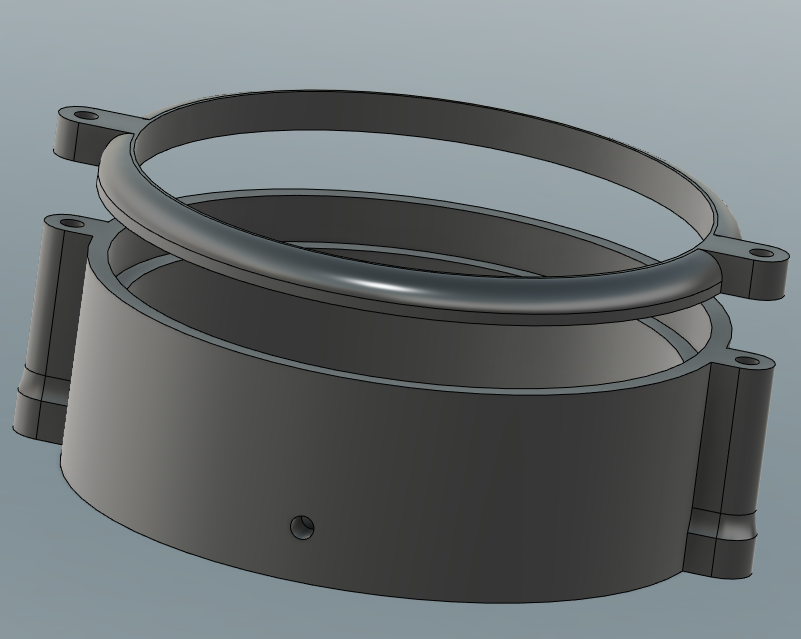
The black plastic piece had a sturdy column extending down on its underside so I decided to use a tactile button in place of the limiter switch I had picked out originally. Using a long cap on the tactile button allowed me to slip a spring over it so that it would push the black plastic upwards after being pressed. After soldering the wires to the switch I coated things with hot glue to prevent shorts when wet and assembled the final product.
Bunny quickly learned to use the button, but would be a bit aggressive with it (as you can see in the video) so as a final touch I attached it to a small wooden board and attached that to the deck with a couple wood screws.